Table of Contents
ToggleAmazon-owned security cameras have come a long way since their early days. They’re affordable, wire easily into Alexa-powered smart homes, and installation is straightforward enough for most DIYers. But with Ring, Blink, and discontinued models like Cloud Cam floating around the resale market, choosing the right system means understanding what fits your home’s layout, your skill level, and your monitoring needs. This guide walks through the top options in 2026, what makes them worth installing, and how to mount and configure them without paying for professional setup.
Key Takeaways
- Amazon security cameras like Ring and Blink offer affordability and Wi-Fi-based installation without proprietary hubs, making them ideal for DIY homeowners and renters seeking straightforward setup.
- Ring cameras require a $4–$10/month subscription for video storage and smart alerts, while Blink offers free basic recording with optional local USB storage via the Sync Module 2 hub.
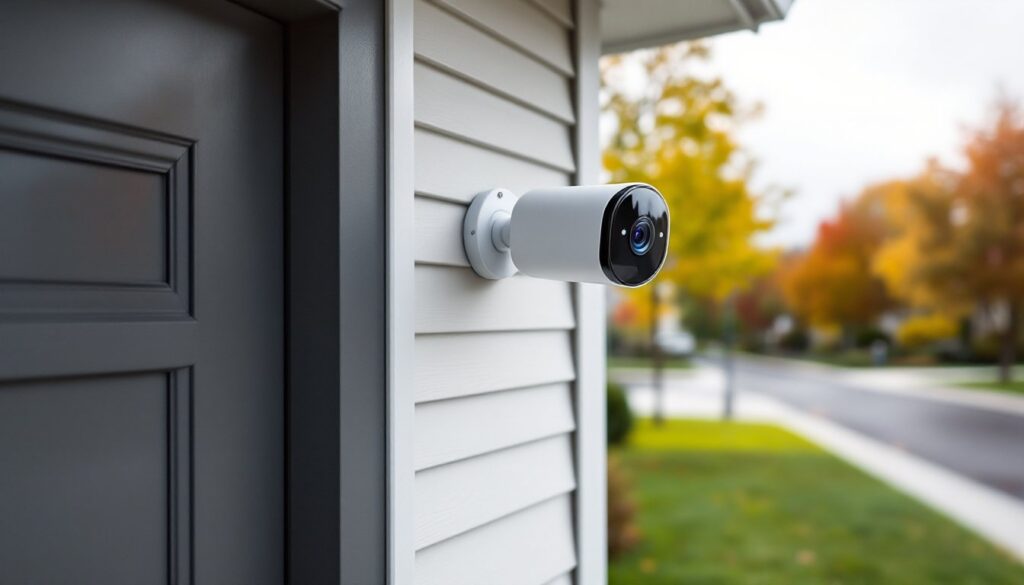
- Proper mounting height (7–9 feet) and a 15–20 degree downward angle are critical for capturing faces and identifying motion events while preventing tampering.
- Alexa integration enables voice commands to view live feeds, create automation routines triggered by motion or doorbell events, and activate Alexa Guard for smoke and glass-break alerts.
- Amazon security camera battery models run 3–6 months on a charge (Ring Stick Up Cam) or up to two years (Blink Outdoor 4), making them perfect for locations without power outlets.
- Test Wi-Fi signal strength before installation and carefully configure motion zones to reduce false alerts from trees, streets, and neighboring properties.
Why Choose Amazon Security Cameras for Your Home
Amazon’s ecosystem offers tight integration with Alexa devices, cloud storage plans that don’t require proprietary hubs, and hardware designed for DIY installation. Unlike older systems that needed hardwired DVRs or complicated network configs, Ring and Blink cameras run on Wi-Fi and mobile apps.
The biggest draw is cost-to-feature ratio. Entry-level Blink cameras start under $40, while Ring’s wired models deliver 1080p or better without the premium pricing of Nest or Arlo. For renters or anyone hesitant to drill into brick or siding, battery-powered models mount with adhesive pads or simple bracket screws.
Another advantage: Alexa integration. Voice commands pull up live feeds on Echo Show devices, and routines can trigger recording when doors unlock or motion sensors trip. If you already own Echo speakers or smart locks, adding cameras means fewer apps to juggle.
That said, these systems lean on cloud subscriptions for advanced features. Without a plan, Ring cameras store no video, and Blink limits clip storage to 7,200 seconds per month on the free tier. Budget for $3–$10/month per camera or a multi-device plan if you want continuous recording or person detection. Also, Amazon’s privacy policies have drawn scrutiny, law enforcement can request footage through Ring’s Neighbors app partnerships, though users can decline. Weigh that against convenience.
Top Amazon Security Camera Options in 2026
Ring Security Cameras
Ring dominates Amazon’s lineup with wired, battery, and floodlight models. The Ring Stick Up Cam (wired or battery) is the workhorse: mounts indoors or out, 1080p resolution, two-way audio, and infrared night vision. The wired version pulls power from a standard outlet or low-voltage transformer: the battery variant uses a rechargeable pack good for 3–6 months depending on activity.
For perimeter lighting, the Ring Floodlight Cam combines motion-activated LED floods with a camera. It requires a junction box and 120V wiring, so you’ll need basic electrical skills and possibly a permit depending on your jurisdiction (check local codes before tapping into household circuits). The camera head pivots, and the lights throw enough lumens to cover a driveway or backyard entry.
Ring’s Video Doorbell Pro 2 offers 1536p resolution, head-to-toe view, and 3D motion detection that maps zones in your yard. Installation is straightforward if you have existing doorbell wiring (16–24V AC transformer). If not, you’ll need to run low-voltage wire or use the battery model.
All Ring cameras require a Ring Protect subscription ($4/month per device or $10/month whole-home) for video storage and smart alerts. Without it, you get live view only, no recordings.
Blink Security Cameras
Blink prioritizes battery life and minimal setup. The Blink Outdoor 4 runs on two AA lithium batteries for up to two years, making it ideal for spots without outlets, shed corners, detached garages, or fence posts. It records 1080p clips triggered by motion and integrates with Alexa.
The Blink Mini is the budget champion: $30 wired indoor camera with live view and motion alerts. It plugs into a standard USB power adapter and mounts with a small base or wall bracket. Great for monitoring entryways, nurseries, or workshops without running network cable.
Blink’s Sync Module 2 hub supports local storage via USB drive (up to 256GB), so you can skip cloud subscriptions entirely if you don’t need remote access to old clips. The free tier covers basic recording: the Blink Subscription Plus ($10/month) adds extended storage, person detection, and live view sharing.
Blink cameras trade some image quality and features for convenience. They’re lighter on resolution than Ring, and night vision range maxes out around 20 feet. But for seasonal cabins, rental properties, or anywhere you want eyes without electrical work, they’re hard to beat. One caveat: cold weather below 0°F can drain batteries faster or cause the camera to shut down. If you’re in a harsh climate, position cameras under eaves or use the wired models.
How to Install Your Amazon Security Camera: A DIY Step-by-Step Guide
Most Amazon cameras install in under 30 minutes. Here’s the process for a typical outdoor battery-powered unit like the Blink Outdoor or Ring Stick Up Cam.
Tools and Materials:
- Drill/driver with bits (masonry bit for brick/concrete, standard twist bits for wood siding)
- Level (or smartphone level app)
- Pencil
- Ladder (if mounting above 6 feet)
- Screwdriver (often included in camera kit)
- Mounting bracket and hardware (included)
- Safety glasses
Step-by-Step Installation:
-
Choose your mounting height. Aim for 7–9 feet off the ground. Too low and cameras are easy to tamper with: too high and faces become hard to identify. Angle the camera downward about 15–20 degrees to capture faces and motion zones.
-
Mark the bracket. Hold the mounting bracket against the wall, use a level to ensure it’s straight, and mark screw holes with a pencil. Double-check the camera’s field of view before drilling, walk the path you want to monitor and confirm the angle covers it.
-
Drill pilot holes. For wood siding or trim, use a 1/8-inch bit. For brick, stucco, or concrete, switch to a masonry bit (usually 3/16-inch) and insert the included plastic anchors. Wear safety glasses, masonry dust and fragments can fly.
-
Attach the bracket. Secure it with the provided screws. If you’re mounting to hollow vinyl siding, find a stud or sheathing behind it: toggle bolts work in a pinch but aren’t ideal for outdoor vibration.
-
Snap or screw the camera onto the bracket. Most models twist-lock or slide into place. Battery models pop off easily for recharging.
-
Run wiring (if applicable). For wired Ring or Blink Mini cameras, route the power cable through a small hole drilled near the bracket or under an eave. Seal the entry point with silicone caulk to prevent water intrusion. If wiring a floodlight cam, turn off the circuit breaker, confirm power is off with a non-contact voltage tester, and follow the manufacturer’s wiring diagram. If you’re not comfortable with household voltage, hire a licensed electrician, 120V work requires permits in many jurisdictions and mistakes can cause fires.
-
Adjust the angle. Tilt and pan the camera to frame your target area. Check the live view in the app before finishing.
Pro Tips:
- Pre-drill everything. Forcing screws into hardwood or composite trim can crack it.
- Use weatherproof wire nuts and tape for outdoor electrical connections (if hardwiring).
- Test Wi-Fi signal strength at the install location before mounting. If the signal is weak, consider a Wi-Fi extender or mesh router node.
- Acclimate batteries. If installing in winter, let lithium batteries warm to room temperature first, cold cells perform poorly during initial setup.
For indoor cameras like the Blink Mini, you can skip drilling entirely and use the included stand on a shelf or countertop. Just make sure the camera isn’t backlit by a window, which washes out daytime footage.
Home automation enthusiasts often find smart home device reviews helpful when comparing installation complexity across brands.
Setting Up Smart Features and Alexa Integration
Once mounted, configuration happens in the Ring or Blink app (iOS/Android). Download it, create an account, and follow the in-app prompts to add your camera. You’ll need your Wi-Fi network name and password, cameras connect to 2.4 GHz bands, not 5 GHz, so choose the correct SSID if your router broadcasts both.
Motion Zones and Sensitivity:
Both Ring and Blink let you draw motion zones on a grid overlay. Block out busy streets, swaying trees, or neighbors’ driveways to reduce false alerts. Adjust sensitivity sliders, start at medium and dial up if you’re missing events or down if squirrels trigger constant clips.
Alexa Integration:
In the Alexa app, tap Devices > Add Device > Camera and select Ring or Blink. Once linked, you can say, “Alexa, show the front door camera” to pull the feed on an Echo Show. Create Alexa Routines to turn on lights when motion is detected or announce doorbell rings through all Echo devices.
You can also enable Alexa Guard, which listens for glass breaking or smoke alarms and sends alerts. Pair this with camera triggers for a basic DIY alarm system.
Cloud Storage vs. Local:
Ring stores clips in the cloud only with a subscription. Blink offers local storage via Sync Module 2 USB (supports FAT32-formatted drives up to 256 GB). If privacy is a priority, local storage keeps footage off Amazon’s servers, though you lose remote access to old clips unless you’re on the same network.
Firmware Updates:
Cameras update automatically when connected to Wi-Fi and power. If a camera goes offline or behaves oddly, check the app for pending updates. Many connectivity hiccups come from outdated firmware. Early Amazon Cloud Cam owners learned this the hard way, as documented in reviews highlighting performance issues before patches.
Privacy Settings:
Disable audio recording if you’re only interested in video. Turn off sharing with Neighbors (Ring’s community feature) if you don’t want Ring or law enforcement requesting your clips. Adjust notification schedules so alerts don’t wake you overnight, most apps let you set “quiet hours.”
For households juggling multiple smart home platforms, keeping up with home automation trends helps identify compatibility gaps before buying.
Conclusion
Amazon security cameras deliver solid value for DIYers willing to handle basic mounting and app setup. Ring and Blink cover the spectrum from budget battery cams to hardwired floodlights, and Alexa integration ties everything into routines and voice control. Installation is manageable with standard tools, though hardwired models may need an electrician depending on your comfort with household voltage. Factor in subscription costs, test your Wi-Fi coverage, and don’t skip motion zone tuning, that’s where most DIY installs succeed or frustrate.