Table of Contents
ToggleSecurity cameras have evolved beyond fixed-angle lenses that leave blind spots in your coverage. A 360-degree camera eliminates the guesswork and the need for multiple units pointed in different directions. Whether installing one indoors to monitor a large living area or outdoors to cover an entire driveway, these panoramic cameras deliver continuous surveillance without gaps. This guide walks through what makes 360 cameras different, where to mount them for maximum effectiveness, and how to install them yourself without hiring a pro.
Key Takeaways
- A 360 security camera eliminates blind spots by capturing a complete 360-degree view, allowing one unit to replace three or four fixed cameras in open-plan spaces like garages and basements.
- Mount your 360 camera 8–10 feet high at the center of large rooms or outdoors at corners and junction points to maximize coverage and prevent tampering.
- Choose cameras with at least 4MP resolution and enable local microSD storage as backup, since lower pixel density per zone and bandwidth requirements make redundancy critical.
- Use PoE (Power over Ethernet) for permanent outdoor installations to avoid Wi-Fi signal degradation and ensure stable, uninterrupted connections.
- Level the 360 camera perfectly horizontal during installation, seal outdoor cable penetrations with weatherproof silicone caulk, and test night vision for IR reflection issues before finalizing setup.
- Keep firmware updated quarterly and configure motion detection zones around high-priority areas while excluding trees or busy streets to reduce false alarms and improve security reliability.
What Is a 360 Security Camera and How Does It Work?
A 360 security camera uses either a fisheye lens or dual-lens system to capture a complete horizontal field of view around its mounting point. Unlike traditional cameras that record a narrow cone (typically 90–130 degrees), a 360 unit sees everything in all directions simultaneously.
Fisheye models use a single ultra-wide lens that distorts the image into a circular view. Software then “dewarp” the footage into a more natural perspective, letting users pan digitally across the scene. Dual-lens cameras stitch together images from two back-to-back lenses to create a seamless panorama. Both approaches eliminate blind spots directly below or beside the camera.
Most 360 cameras record at 1080p or higher resolution. Because the sensor covers such a wide area, effective pixel density per zone is lower than a fixed camera zoomed on one spot. For that reason, many installers pair a 360 overview camera with a second fixed unit aimed at high-priority zones like doors or safes.
Power options include PoE (Power over Ethernet), which runs power and data over a single Cat5e or Cat6 cable, and battery or plug-in Wi-Fi models. PoE is preferred for permanent outdoor installs because it avoids the need to run separate power lines and provides a more stable connection than wireless.
Key Benefits of Installing a 360 Security Camera in Your Home
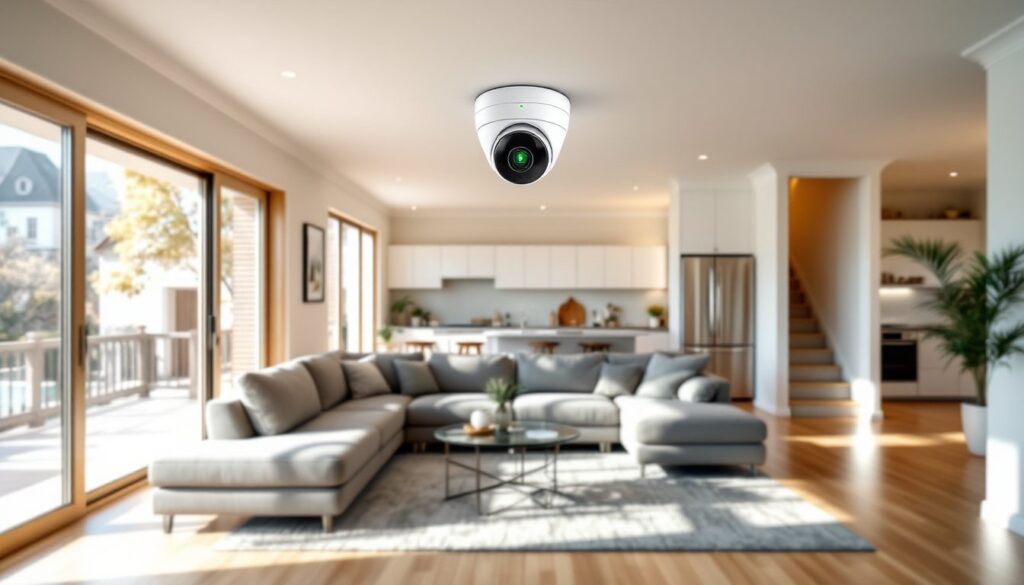
Fewer cameras, broader coverage. One ceiling-mounted 360 camera can replace three or four fixed units in open-plan spaces like garages, basements, or great rooms. That cuts hardware costs and simplifies wiring runs.
No moving parts. PTZ (pan-tilt-zoom) cameras use motors that wear out and create noise. A 360 camera is entirely static: digital panning happens in software, so there’s nothing mechanical to fail.
Continuous recording of all angles. If an intruder moves through a room, the camera captures the entire path without waiting for a PTZ to track or a motion sensor to trigger. Reviewers of systems like the Ezviz ez360 Pano note this advantage for post-incident review.
Easier forensic playback. Because the entire scene is recorded, users can digitally pan and zoom during playback to follow a subject or check details they missed during live view. Fixed cameras only show what was in frame at the time.
Aesthetic simplicity. A single dome on the ceiling is less obtrusive than multiple bullet or turret cameras bracketed to walls. For interior installations in finished spaces, that cleaner look matters.
Top Features to Look for When Choosing a 360 Security Camera
Resolution and bitrate. Look for at least 4MP (2560×1440) resolution. A 1080p sensor spread across 360 degrees gives roughly 5 pixels per degree, which isn’t enough to identify faces at distance. Higher bitrates (4–8 Mbps) preserve detail when dewarping fisheye footage.
Night vision range. Infrared LEDs rated for 30–50 feet are standard. Some models use starlight sensors that produce color images in very low light without IR illumination. If mounting outdoors under an eave with no nearby light, prioritize IR range.
Weather rating. Outdoor units should carry an IP66 or IP67 rating, meaning dust-tight and protected against heavy rain or temporary immersion. Check the operating temperature range if you’re in a region with freezing winters or desert summers.
Local vs. cloud storage. Cameras with microSD slots (128–512 GB) let you record without a subscription. Cloud plans add off-site redundancy but typically cost $3–10 per month per camera. Hybrid systems that write to both a local NVR and the cloud offer the best protection against tampering.
Smart detection and alerts. AI-based person/vehicle detection cuts false alarms from trees, animals, or headlights. Two-way audio is useful for package delivery instructions or deterring trespassers. Integration with home automation platforms (HomeKit, Alexa, Google Home) lets you view live feeds on smart displays and trigger lights or sirens.
Best Locations to Install 360 Cameras Around Your Property
Center of large rooms. Mount a 360 camera on the ceiling at the midpoint of a garage, workshop, or open living area. This placement maximizes coverage and minimizes the number of objects (like hanging lights or ductwork) that create shadows or occlusions.
Corners or junction points outdoors. Position a camera where a driveway meets the street, or at the intersection of two fence lines. The 360 view captures activity approaching from any direction without needing multiple fixed cameras.
High under eaves. Install 8–10 feet above ground to keep the unit out of reach while still capturing faces and license plates. Too high and you lose facial detail: too low and the camera becomes a vandalism target.
Above entryways (with caution). A 360 camera directly above a door can show both sides of the entry and the approach path. But, the wide-angle lens may distort faces if people stand very close. Pair it with a second fixed camera at eye level for positive ID.
Avoid direct sunlight and glare sources. Mounting a camera facing a sunset or a bright floodlight will wash out half the image. Use eave overhangs or shaded corners, and enable WDR (Wide Dynamic Range) in camera settings to balance bright and dark zones.
DIY Installation Tips for 360 Security Cameras
1. Plan the cable run before drilling. For PoE installs, route Cat6 cable from the camera location to your NVR or PoE switch. Use a fish tape or glow rod to pull cable through walls or attic spaces. Leave an extra 2–3 feet of slack at both ends for terminations and future adjustments.
2. Use a ceiling-mount junction box. A standard round 4-inch junction box works for most dome cameras. Anchor it to a ceiling joist or blocking with 1⅝-inch wood screws. Drywall anchors alone won’t support the camera’s weight plus wind load outdoors.
3. Seal outdoor penetrations. After running cable through an exterior wall, fill the hole with silicone caulk rated for outdoor use. Use a drip loop on the cable just before it enters the box so water runs off instead of following the wire inside.
4. Level the camera for accurate dewarping. Most 360 cameras assume they’re mounted perfectly horizontal. Use a bubble level or the camera’s built-in alignment grid (visible in the app during setup) to ensure the lens is parallel to the floor or ground. A tilted camera produces a skewed panorama.
5. Configure motion zones and schedules. After powering on, log into the camera’s interface and draw activity zones around driveways, walkways, and doors. Exclude trees, flags, or busy streets to reduce false alerts. Set a recording schedule if you only need footage during certain hours, or enable continuous + event recording to capture both baseline footage and flagged incidents.
6. Test night vision and IR reflection. Turn off lights and check the live feed. If you see a bright halo or washout, the IR LEDs are reflecting off a nearby surface (window, siding, or the camera’s own housing). Adjust the mounting angle or disable built-in IR and add an external IR illuminator positioned a few feet away.
Safety note: Wear safety glasses when drilling overhead, and use a sturdy ladder with a helper to hand up tools. If running cable through an attic, watch for exposed nails, low clearances, and loose insulation that can obscure your footing.
Common Mistakes to Avoid with 360 Camera Setup
Mounting too low. Installers often place cameras at 6–7 feet, thinking it improves facial detail. In reality, it makes the unit easy to disable with a broom handle or spray paint. Keep outdoor cameras at least 9 feet high and angled slightly downward.
Ignoring bandwidth requirements. A 4MP camera at 15 fps consumes roughly 4–6 Mbps of upload bandwidth if streaming to the cloud. Multiple cameras on a home network can saturate a basic router. Use a managed PoE switch with QoS (Quality of Service) to prioritize camera traffic, or upgrade to a router with gigabit WAN ports if your ISP supports it.
Skipping firmware updates. Security vulnerabilities in camera firmware are common. Enable automatic updates in the camera settings, or check the manufacturer’s support page quarterly. According to research highlighted by Digital Trends, many breaches of home cameras stem from outdated software, not weak passwords.
Relying solely on wireless connections outdoors. Wi-Fi signals degrade through walls, siding, and weather. A camera 50 feet from the router may show full bars during installation but drop to one bar during heavy rain. For any permanent outdoor camera, run Ethernet cable and use PoE.
Overlooking local recording redundancy. Cloud-only cameras become useless if your internet goes down or the service shuts down. Always enable local storage via microSD card or NVR as a backup. Format cards as exFAT or the camera’s native file system to avoid corruption from repeated write cycles.
Forgetting to test playback. After installation, trigger a motion event and verify that footage appears in the app or NVR interface. Check that timestamps are correct, night vision activates, and digital pan/zoom functions work. Many users discover recording failures only after an incident.
Conclusion
A well-placed 360 camera eliminates coverage gaps and simplifies whole-home surveillance. Proper mounting height, solid cable runs, and attention to IR reflection make the difference between a system that works year-round and one that frustrates. Take the time to plan locations, test recordings, and keep firmware current, your future self will thank you when you need that footage.