Table of Contents
ToggleHard water isn’t just about spots on glassware. It’s scaling up inside your water heater, clogging faucet aerators, and making soap work harder than it should. If you’re shopping for a whole-house water softener, the Clack WS1 keeps coming up, and for good reason. It’s a workhorse valve that’s been around long enough to prove itself in real-world installations, not just manufacturer spec sheets. This guide covers what sets the Clack WS1 apart, how it works, what’s involved in installation, and whether it’s the right fit for your home’s water treatment needs.
Key Takeaways
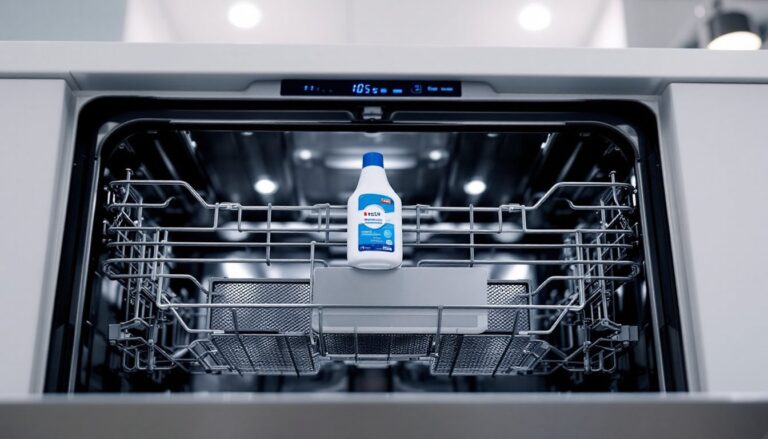
- The Clack WS1 water softener control valve uses demand-initiated regeneration to save salt and water by only regenerating based on actual water usage rather than fixed schedules.
- Proper installation of the Clack WS1 requires positioning after your main shutoff valve, running drain lines with air gaps, and programming water hardness settings based on water test results.
- A Clack WS1 system extends appliance lifespan, reduces soap and detergent usage, and maintains consistent water pressure by eliminating scale and mineral buildup from hard water.
- Monthly salt level checks and annual resin cleaning are the main maintenance tasks needed to keep the WS1 operating efficiently and prevent common issues like salt bridges or clogged injectors.
- The Clack WS1 is ideal for homes with moderate to high water hardness, DIY installation comfort, and a preference for reliable, serviceable equipment over smart-home features.
What Is the Clack WS1 Water Softener?
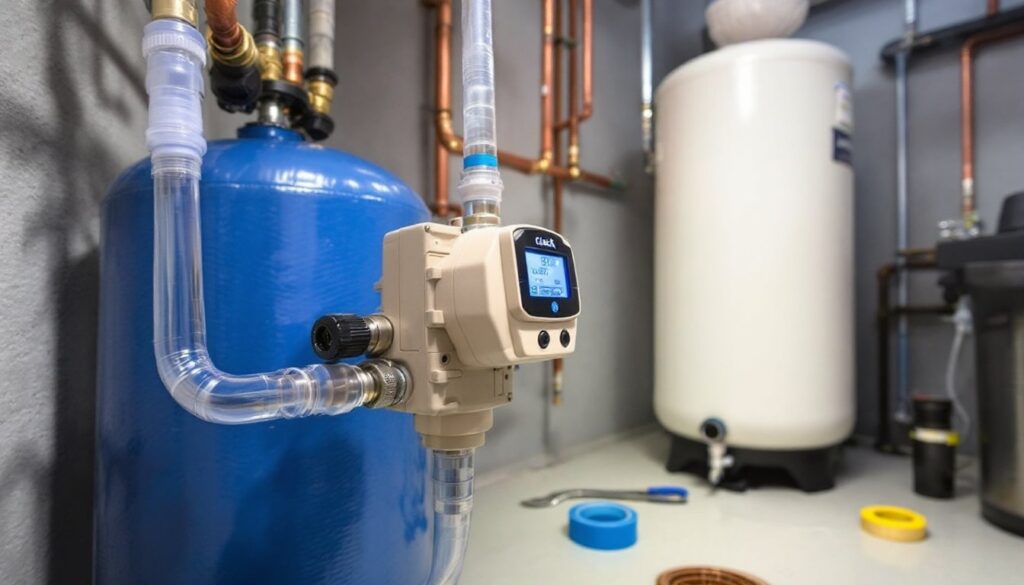
The Clack WS1 isn’t a standalone softener system, it’s the control valve and timer that regulates how the softening tank regenerates. Think of it as the brain of the operation. Most water softeners use one of a handful of valve manufacturers, and Clack is one of the most trusted names in the industry, alongside brands like Fleck and Autotrol.
The WS1 uses a demand-initiated regeneration (DIR) cycle, which means it only regenerates based on actual water usage rather than on a fixed schedule. This saves salt and water compared to time-clock systems that regenerate whether you need it or not. The valve controls when brine is drawn from the salt tank, when the resin bed gets backwashed, and when the system goes back to normal service.
You’ll typically find the WS1 valve installed on water softener tanks sold by assembly companies or DIY suppliers. It’s not branded under one retail name, lots of manufacturers build their systems around Clack valves because they’re reliable and serviceable.
Key Features and Specifications
The Clack WS1 is designed to handle residential and light commercial applications. Here’s what you’re working with:
- Flow rate capacity: Up to 12 GPM (gallons per minute) in standard configurations, which covers most single-family homes.
- Inlet/outlet size: Typically 1-inch NPT threads: confirm your main line size before ordering fittings.
- Regeneration type: Downflow or upflow brining, depending on how the system is configured. Most residential setups use downflow.
- Display: Backlit LCD screen showing time, remaining capacity, current gallons used, and error codes.
- Power requirement: Runs on a plug-in transformer (typically 24V). Some models offer a battery backup option, which is worth considering if you lose power frequently.
- Bypass valve: Built-in or external three-valve bypass for servicing without shutting off house water.
The WS1 supports adjustable hardness settings, so you can dial it in based on your water test results. If your municipal or well water is 15 grains per gallon (GPG), you program that into the valve so it knows when the resin is exhausted.
How the Clack WS1 Control Valve Works
The valve uses a piston-and-seal system to direct water flow through different stages: service, backwash, brine draw, rinse, and refill. A small motor rotates the piston based on commands from the control board.
During normal use (service mode), hard water enters the tank, passes through the resin bed where calcium and magnesium ions are swapped for sodium, and softened water exits to your home’s plumbing. When the valve detects that the programmed capacity is reached, say, 3,000 gallons, it initiates regeneration, usually at 2 a.m. to avoid disrupting daytime use.
The brine draw phase pulls salt solution from the brine tank and flushes it through the resin to recharge it. Then the system backwashes to clear out leftover debris and repacks the resin bed. Total regen time is typically 90 to 120 minutes, depending on tank size and settings.
One nice feature: the WS1 calculates regen timing based on reserve capacity. If you’re approaching the set limit and it’s getting close to the scheduled regen time, it’ll hold off until the preset hour to avoid multiple cycles in one day.
Benefits of Installing a Clack WS1 Water Softener
Beyond eliminating scale, a properly sized and programmed Clack WS1 system delivers measurable improvements:
Extended appliance life. Water heaters, dishwashers, and washing machines last longer when they’re not fighting mineral buildup. Heating elements and pumps stay cleaner.
Lower detergent and soap usage. Soft water lathers more easily, so you’ll use less dish soap, laundry detergent, and shampoo. That adds up over time.
Better fixture performance. Showerheads stay unclogged, and faucet aerators don’t need constant cleaning. Water pressure stays consistent.
Efficiency. The demand-based regeneration means better water softener efficiency compared to older timer-only models. You’re not wasting salt or flushing the system unnecessarily.
Clack valves are also serviceable. Parts are available, and many techs are familiar with them. If a seal wears out or the motor fails, you’re not replacing the whole valve, just the component.
Installation Guide for the Clack WS1 System
Installing a water softener is well within DIY reach if you’re comfortable with basic plumbing. You’ll need to tie into your main water line after the pressure tank (if on a well) or after the main shutoff (if on city water), but before any branch lines or the water heater.
Tools and materials you’ll need:
- Pipe cutter or hacksaw
- 1-inch copper, PEX, or CPVC fittings to match your existing plumbing
- Adjustable wrenches and pipe wrench
- Teflon tape or pipe dope
- Bucket and towels (there will be residual water in the lines)
- Drain line tubing (usually 1/2-inch vinyl or PEX) for the backwash discharge
- Electrical outlet nearby (must be GFCI-protected if in a damp location per NEC)
Step-by-step installation:
- Shut off the main water supply and open a faucet downstream to drain the line.
- Cut into the main line at your chosen location. Leave enough room, you’ll need clearance for the inlet/outlet and bypass valve.
- Install the bypass valve assembly on the softener head. Most Clack WS1 systems come with a yoke or three-valve bypass. Tighten it snugly, but don’t overtorque plastic threads.
- Connect the inlet side (coming from the main supply) to the inlet port on the valve, and the outlet (going to the house) to the outlet port. Double-check orientation, arrows on the valve indicate flow direction.
- Run a drain line from the valve’s drain port to a floor drain, sump, or standpipe. This line must have an air gap to meet plumbing code (typically 1.5 to 2 inches above the drain opening). Don’t connect it directly into a sealed drain.
- Connect a brine line (small tubing, usually 3/8-inch) from the valve to the float assembly inside the brine tank.
- Plug in the transformer and set the time on the control head.
- Program the valve: Enter your water hardness (GPG), salt dose, and regeneration time. Consult your water test or municipal report for hardness.
- Fill the resin tank with water manually using a hose or by opening the bypass slowly. This prevents air pockets.
- Initiate a manual regeneration cycle to seat the resin and confirm all connections are watertight.
Safety and code notes:
Most jurisdictions don’t require a permit for a water softener, but check local codes. Some areas restrict discharge into septic systems. If you’re on a septic tank, confirm that the additional brine and backwash water won’t overload the system, you may need to run the drain line to a drywell or municipal sewer tie-in.
If cutting copper, wear safety glasses. If soldering, use a fire-resistant cloth and keep a fire extinguisher nearby.
Maintenance and Troubleshooting Tips
The WS1 is low-maintenance, but it’s not zero-maintenance. Follow these practices to keep it running smoothly:
Monthly:
- Check the salt level in the brine tank. Keep it at least half full, and break up any salt bridges (a hard crust that forms above the water line, preventing salt from dissolving).
- Inspect the brine tank for sludge or debris at the bottom. Clean it out annually if you’re using lower-grade salt.
Quarterly:
- Wipe down the control head and check for error codes on the display. Common codes include low salt, motor stall, or flow sensor issues.
Annually:
- Pour a resin cleaner (such as Iron Out or Res-Up) into the brine tank before a regeneration cycle. This removes iron fouling and keeps the resin bed efficient.
- Inspect the drain line and air gap for clogs or debris.
Common troubleshooting:
- No soft water: Verify hardness is programmed correctly and the system has regenerated. Check bypass valve position, it may be in bypass mode.
- Constant regeneration or won’t stop: Usually a stuck piston or failed motor. You may need to manually advance the cycle or replace the drive motor.
- Salt not depleting: Check for a salt bridge or clogged injector. The injector is a small orifice that pulls brine: it can clog with sediment. Remove and rinse it under water.
- Low water pressure: Inspect the inlet screen for debris. The WS1 has a small filter screen at the inlet, backflushing or replacing it usually solves this.
If the control board or motor fails and you’re not comfortable with electrical diagnostics, call a water treatment tech. Replacement parts are available online, but expert reviews on metered systems often note that proper diagnosis saves money over trial-and-error part swapping.
Is the Clack WS1 Right for Your Home?
The Clack WS1 is a solid choice if you want a reliable, efficient, and serviceable valve without paying for bells and whistles you won’t use. It’s especially well-suited for:
- Homes with moderate to high hardness (10+ GPG) where demand-based regeneration makes a real difference in salt and water savings.
- DIYers who want a system they can install and maintain themselves. The WS1 has a long track record, and parts/support are widely available.
- Households that want flexibility. The programmable settings let you fine-tune based on actual water quality, not generic factory defaults.
When to consider alternatives:
If your water has high iron content (above 3 ppm), you may need a dedicated iron filter or specialized resin. The WS1 can handle low levels, but heavy iron will foul standard resin quickly.
If you want smartphone connectivity, remote monitoring, or leak detection, newer “smart” valves offer those features. The WS1 is straightforward, no app, no Wi-Fi.
For very large homes (4+ bathrooms, high simultaneous demand), confirm the flow rate and tank size match your peak usage. The WS1 tops out around 12 GPM: if you need more, you may need a larger valve or dual-tank setup.
Bottom line: The Clack WS1 is a workhorse valve that does the job without drama. It’s not flashy, but it’s proven. If you value long-term reliability and the ability to fix it yourself, it’s hard to beat.